How To Make a Solar Lantern From a Mason Canning Jar
Solar lanterns are a smart, fun, easy and inexpensive way to spruce up your backyard, patio, pathway, tree canopy, garden or campsite. They are quick and simple to make, beautiful, practical and require very little maintenance (just occasionally wipe off the top of the solar panel). They also make great gifts. Who doesn't love eco-friendly, clean renewable energy?
Materials and Tools You Will Need
- Mason Jars - Get the pint-size. The product featured in this article is Ball brand, vintage blue color, wide mouth size. Clear glass jars work equally as awesome.
- A Solar Pathway Light Set -
- epoxyor any other sturdy waterproof glue
- needle-nose pliers
- jewelers wire or any wire that bends easily and is not prone to rusting
Optional Materials
- hacksaw
- sandpaper
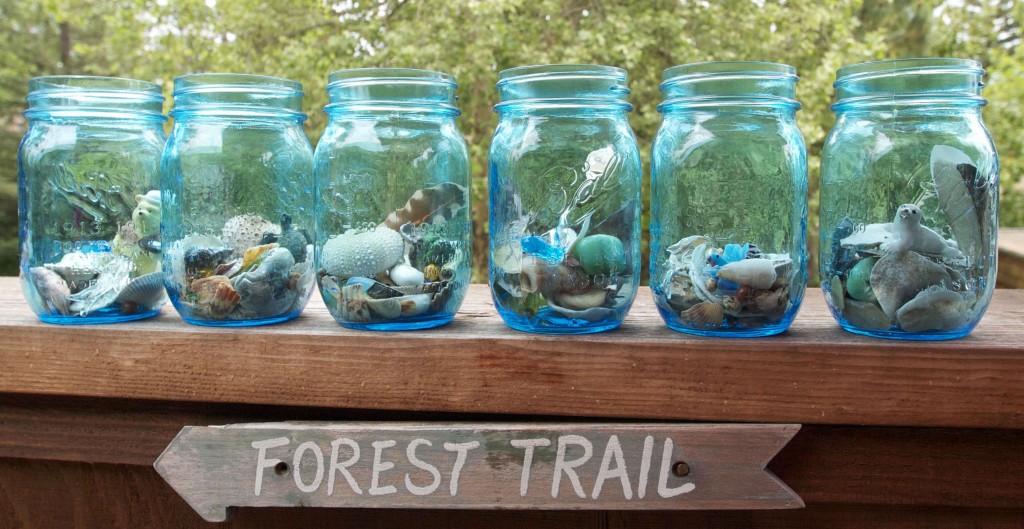
- decorative fill of some sort (heavy items recommended for standing lanterns, lighter for hanging ones)
Assembly Process
Remove lids from the Mason jars. Remove pathway lights from their packaging but do not assemble them.
Cut the bottom off of the solar lights (where you are supposed to attach it to its ground stake) and sand it if you like.
When finished sanding, grasp the solar light in one hand and the tiled mosaic plastic cover in the other, twist the plastic cover counter clockwise and it will detach from the solar light,
revealing the orange tab that needs to be pulled out in order to activate the light.
After pulling the orange tab out,
replace the tiled mosaic plastic cover by twisting (clockwise) it back on.
Fill the mason jars with whatever you like or leave them empty, if you prefer.
Gluing the Solar Light to the Mason Jar
Keep in mind that the two main products featured in this article (pint size Ball Mason jars and Luminar Outdoor Three Piece Mosaic Solar Pathway Light Set) fit particularly well together.
Many other brands were paired and did not fit as well. It is a good idea to bring a mason jar with you when shopping for your solar light package. Take the lights out of the box and check the fit before purchasing them. If you are ordering your supplies online, double check the dimensions of the solar lights to make sure they will fit on the Mason jar rim.
Leave the solar lights on the Mason jars outside in the sun to charge for a day (four - 12 hours) before you glue them together. Occasionally a solar light is faulty right out of the box and doesn't work well or at all. If a light doesn't work, it's better to find out before you glue it to a Mason jar and can't return it.
The best way to glue a full Mason jar to a solar light is to use epoxy glue or another equally strong and waterproof adhesive material.
Wait for the epoxy to get tacky so that it won't run down the jar too much and apply it to the rim of the Mason jar. Use gloves to protect your skin from wayward epoxy. Use a fair amount in order to create a good seal. Wipe off any excess glue that might run down the sides of the jar. Place the light on top of the jar and press down firmly. It helps to place a book or something slightly heavy on top and then wait for the epoxy to set.
Empty jars are the easiest to glue. Turn the solar light upside down and apply waterproof glue to the underside of the top rim of the solar light then place the jar upside-down on top and wait for it to dry.
Once the glue is dry it's time to make the wire hanger.
Making the Wire Hanger
Start with a piece of wire (approximately four to five feet long) and find the middle. Starting from the middle, wrap the wire around the mouth of the mason jar underneath the rim of the solar light. Once you get to the other side, cross the two pieces of wire and twist tightly. Continue to twist the wire together until you have enough room to make an adequate handle.
Once the handle is long enough, place it on the opposite side of the jar and then wrap the excess wire underneath the rim of the solar light and back to where the weaving started.
Cross the wires again
and before twisting make sure to thread the wire through the original wrap so that it doesn't ride up when the handle is held from the top.
Test the handle to make sure that the ends are on opposite sides of the jar achieving a balanced hang before weaving the final wrap.
Continue wrapping the wire until you run out. If the wire runs out in a place that makes the handle look lopsided, you may want to add extra wire to balance it out.
Make sure to use needle nose pliers to tuck in the ends of the wire neatly so that they don't stick out.
The Final Product
Voila! There you have it! A homemade solar lantern.
Have fun! Get creative!
These solar lanterns also make extremely awesome gifts, especially if you fill them with simple souvenirs from an adventure that you've had with the recipient.
We hope you enjoy this project and your new lanterns. In the Springtime, get ready for your summertime garden parties. In the winter, make a few extra for gifts. Your friends' faces will light up as bright as the new light source. If you are looking for a more plug-and-play option when out camping, we recommend buying a solar chargerfor your lantern.


